Hi, message us with any questions.
We're happy to help!


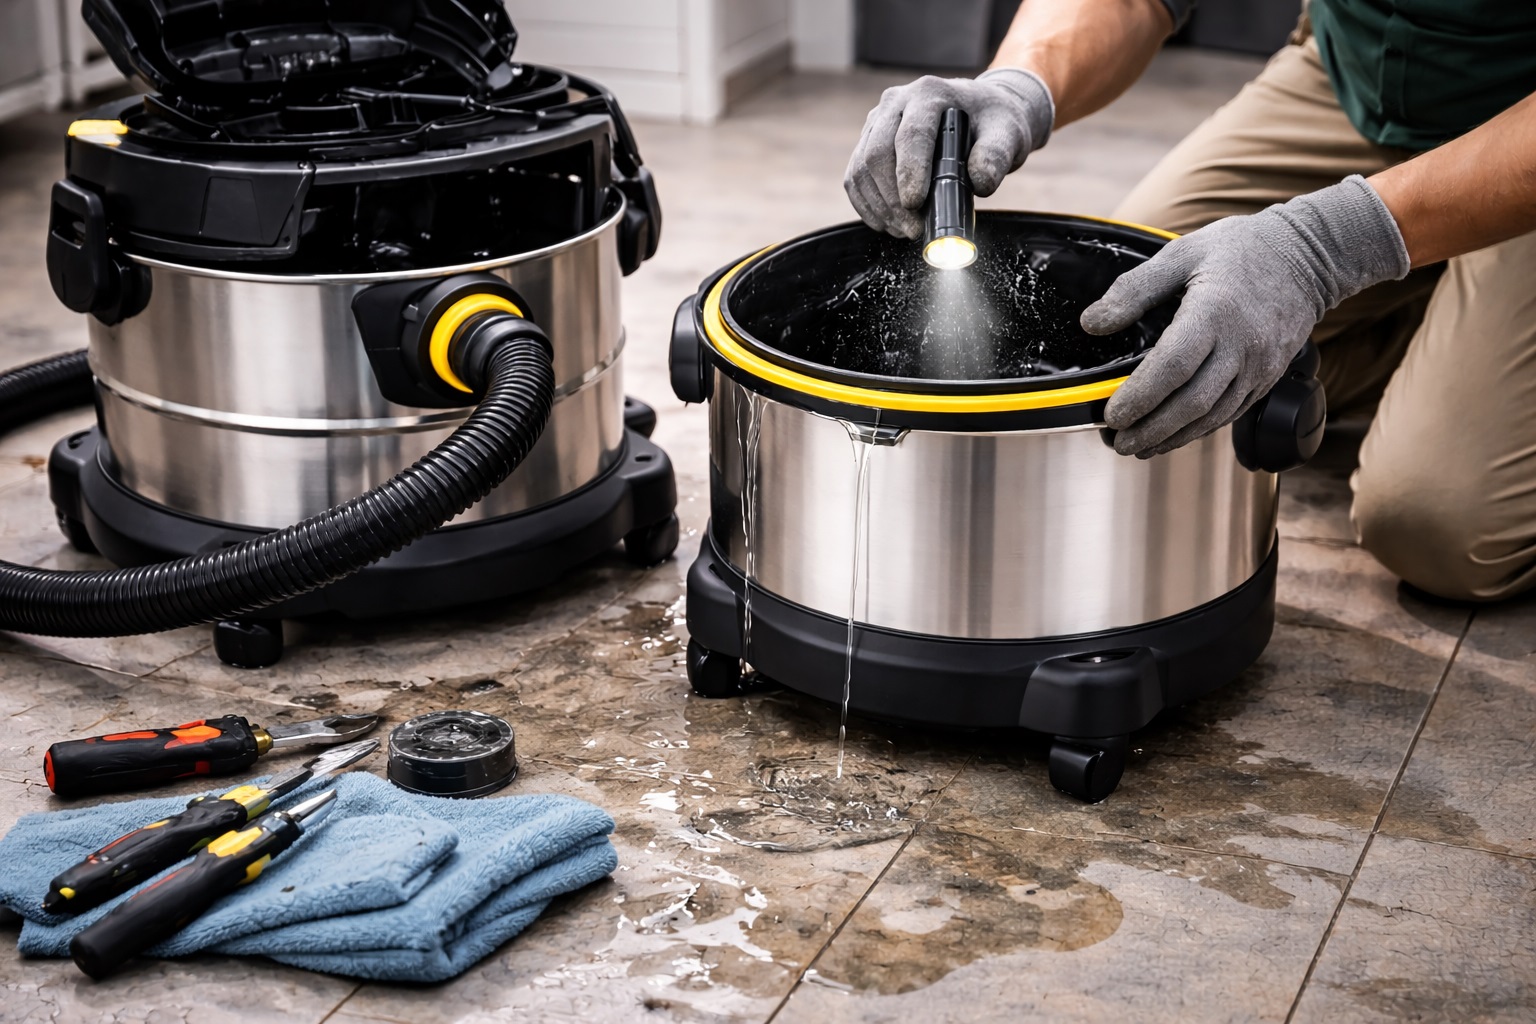 Barrel vacuum cleaners are known for their robust suction power and versatility, making them an essential tool for cleaning homes, offices, and commercial spaces. However, one common issue that vacuum owners often face is leakage, which can significantly reduce the vacuum’s efficiency and lead to damage if not addressed promptly. Whether it's air leaks or dust escaping from the vacuum, these issues can be frustrating. In this guide, we'll explore the common causes of leakage in barrel vacuum cleaners and provide practical solutions on how to fix them.
1. Air Leaks from the Hose or Nozzle
One of the most common causes of leakage in barrel vacuum cleaners is air escaping from the hose or nozzle. This can happen if the hose or nozzle becomes loose, cracked, or blocked.
Possible Causes:
Loose Hose Connection: Over time, the hose connection may become loose, leading to air leaks.
Cracks or Holes in the Hose: The hose itself can develop cracks or holes due to wear and tear or improper storage.
Blockages in the Hose or Nozzle: A clogged hose or nozzle can cause an imbalance in pressure, leading to air leaks.
Troubleshooting Steps:
Check the Hose Connections: Ensure that the hose is tightly connected to both the vacuum body and the nozzle. If the hose is loose, it may need to be tightened or replaced.
Inspect the Hose for Damage: Look for any cracks or holes in the hose. If the hose is damaged, replace it with a new one to prevent air leakage.
Clear Blockages: If there’s a blockage in the hose or nozzle, use a broomstick or flexible tool to clear any debris. This will restore normal airflow and prevent leaks.
Case Study:
A Multi-Functional Durable Vacuum Cleaner user noticed a decrease in suction power and an increase in noise during operation. After inspecting the hose, they found a small crack. Replacing the hose immediately restored suction and resolved the leakage issue, demonstrating how important it is to regularly check the vacuum hose.
2. Leaks Around the Dustbin or Dustbag
Leaks around the dustbin or dustbag can lead to dust escaping from the vacuum, reducing its efficiency and affecting air quality. This issue can also make cleaning more difficult.
Possible Causes:
Loose Dustbin or Dustbag: If the dustbin or bag is not securely fastened, air can escape from the vacuum.
Full or Overfilled Dustbag: A full dustbag may not seal properly, causing dust and debris to leak out.
Damaged Dustbin or Dustbag: Tears or holes in the dustbin or dustbag can also result in leakage.
Troubleshooting Steps:
Check the Dustbin for Proper Sealing: Make sure the dustbin is securely attached to the vacuum body. If the seal is damaged or worn, replace it.
Empty or Replace the Dustbag: If the dustbag is full, empty it or replace it with a new one. Always ensure the bag is properly sealed before attaching it back to the vacuum.
Inspect the Dustbin for Damage: Look for any cracks or holes in the dustbin. If the dustbin is damaged, replace it with a new one.
Example:
A user of a Wet Dry Vacuum Cleaner found that dust was escaping from the vacuum even though the dustbin was in place. Upon closer inspection, they discovered that the dustbin lid wasn’t sealing correctly. After cleaning and reattaching the lid, the issue was resolved, highlighting the importance of checking the dustbin seal.
3. Damaged Gaskets or Seals
The gaskets and seals in your barrel vacuum cleaner ensure that dust and air stay contained within the vacuum. Over time, these gaskets can wear out, crack, or become damaged, leading to leakage.
Possible Causes:
Worn Out Seals or Gaskets: Over time, seals and gaskets can wear out or crack due to regular use, causing leaks.
Improper Installation of Seals: If the gaskets or seals were not installed correctly during assembly, they might not create a proper seal.
Troubleshooting Steps:
Inspect the Seals and Gaskets: Examine the seals and gaskets for cracks, tears, or wear. These are usually located around the dustbin, hose connections, and motor housing.
Replace Damaged Seals or Gaskets: If any seals or gaskets are damaged, replace them with new ones. Most vacuum manufacturers provide replacement parts that fit specific models.
Ensure Proper Installation: When replacing seals, make sure they are installed correctly and securely to prevent any air or dust from escaping.
Case Study:
A Portable Self-Cleaning Vacuum Cleaner user reported a gradual decrease in suction power and an increase in dust escaping during cleaning. Upon inspecting the gaskets, they found that the seal around the motor housing had cracked. Replacing the seal restored suction and solved the leakage problem.
4. Leaks Around the Vacuum Motor
Leaks around the motor housing are less common but can occur, particularly if the vacuum is used heavily or not stored properly. These leaks can allow dust and debris to escape, affecting both suction and air quality.
Possible Causes:
Worn Seals Around the Motor: The seals around the motor can become damaged over time, allowing dust and air to escape.
Improper Assembly or Damage: If the motor housing is not properly assembled or has been damaged, it can lead to leakage around the motor area.
Troubleshooting Steps:
Inspect the Motor Housing: Check the motor housing for cracks, loose parts, or gaps where air could escape.
Check for Proper Assembly: Ensure that all parts of the motor housing are correctly assembled. If any parts are loose or improperly fitted, tighten or reassemble them.
Replace Damaged Seals Around the Motor: If the motor housing seals are damaged, replace them to prevent leakage.
Example:
A Cordless Vacuum Cleaner user noticed that their vacuum cleaner was emitting a strange odor and had reduced suction. Upon investigation, they found a damaged seal around the motor housing. Replacing the seal resolved the issue and restored performance.
5. General Maintenance Tips to Prevent Leaks
To prevent future leakage issues, it’s important to regularly maintain your barrel vacuum cleaner. Here are some general maintenance tips:
1. Regularly Check for Cracks and Wear: Inspect your vacuum regularly for any signs of wear, cracks, or damage, especially in the hose, dustbin, motor housing, and seals.
2. Store Properly: Store your vacuum in a dry and cool place to avoid unnecessary damage to the seals, hoses, and other components.
3. Clean the Vacuum Regularly: Keep the vacuum clean, especially the hose, filters, and dustbin, to avoid blockages and damage that can lead to leaks.
4. Use the Right Vacuum Bags and Filters: Ensure that you’re using the correct size and type of filter bag or dustbin for your vacuum model to prevent overfilling or poor sealing.
Conclusion
Leakage issues in barrel vacuum cleaners can significantly reduce their efficiency and performance. By regularly inspecting hoses, dustbins, gaskets, and motor housing for cracks or damage, you can prevent most leakage problems. Timely replacement of worn seals, clearing blockages, and performing general maintenance will ensure that your Upright Vacuum Cleaners, Household Vacuum Cleaners, Wet Dry Vacuum Cleaners, or Portable Self-Cleaning Vacuum Cleaners continue to function at optimal levels for years to come.
Hashtags:
UprightVacuumCleaners, HouseholdVacuumCleaners, MultiFunctionalDurableVacuumCleaner, WetDryVacuumCleaners, PortableSelfCleaningVacuumCleaner, CordlessVacuumCleaner, VacuumCleanerLeaks, VacuumMaintenance, SuctionPower, VacuumCare,Lanxstar


